Ever had that sinking feeling when your Keurig coffee maker just won’t turn on? You’re not alone.
Before you start mourning your morning cup or dialing customer service, let’s run through some simple checks that might just bring your beloved brewer back to life.
Safety first, though—messing with electrical gadgets can be tricky, so let’s keep it safe and smart.
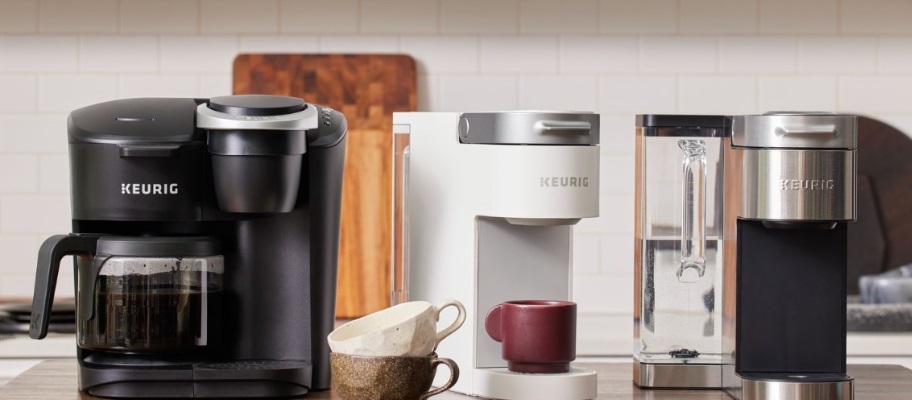
Check out the Keurig Coffee Maker on Amazon now!
Check the Power Source
First things first, let’s look at the plug. It’s basic, but you’d be surprised how often it’s the culprit. Make sure it’s not damaged and that it’s snug in the outlet.
A loose plug is like a loose tooth—it might be there, but it’s not doing much good.
Test the Outlet
Not all outlets are created equal. Some might decide to take a nap just when you need them the most. Grab a lamp or your phone charger and plug it into the same outlet.
No power? You’ve found the problem. If it’s a tripped breaker, flipping it back might just be your morning workout.
Inspect the Power Cord
Power cords have a tough life. They get yanked, twisted, and sometimes even chewed on (pets, we’re looking at you).
Give your Keurig’s cord a once-over to check for any signs of damage or wear. If it looks more like a chew toy than a power cord, it’s time for a replacement.
And there you have it—your first steps towards troubleshooting a Keurig that won’t turn on. Most of the time, it’s something simple.
So before you panic or start googling the nearest coffee shop, give these tips a try. Who knows? You might just save your morning routine with a little bit of detective work.
Check out the Keurig Coffee Maker on Amazon now!
Resetting the Keurig Machine
Sometimes your Keurig just needs a good old reset, kind of like when your phone acts up. Here’s a quick way to give it a fresh start:
- Turn off your machine and unplug it. This is the “have you tried turning it off and on again?” step.
- Wait a full minute. Use this time to ponder life or just stare blankly into space.
- Plug it back in and turn it on. Sometimes, this is all it takes to kick it back into gear.
Water Reservoir Issues
The water tank is like the heart of your Keurig. If it’s not happy, nothing works. Make sure it’s properly attached and that the sensors aren’t blocked by grime or misplaced magnets.
A misaligned tank can send your machine into a sulk, so double-check that everything’s snug and aligned.
Descale and Cleaning
Think of descaling like a spa day for your Keurig. Over time, mineral buildup from water can clog things up and cause all sorts of drama. Here’s why keeping it clean is key:
- Regular descaling keeps the water flowing smoothly, ensuring your brewer can actually brew.
- After descaling, running a few cleansing brews without a pod can help clear out any leftover gunk.
Don’t wait for problems to start. A regular descaling routine can prevent issues and extend the life of your Keurig.
Plus, your coffee will taste better, which is really what it’s all about.
Check out the Keurig Coffee Maker on Amazon now!
Thermostat and Control Board Problems
Think of the thermostat and control board as the brain of your Keurig. If they’re not working right, your brewer is basically on a coffee-making strike.
A faulty thermostat can prevent your machine from knowing it’s go-time, while a busted control board means the whole operation is down.
Solution? This is tricky territory and can vary by model, but here’s a quick fix attempt:
- Warranty Check: First up, if your brewer is still under warranty, let the pros handle it. Opening up your machine could void that warranty.
- Professional Help: If it’s out of warranty, you might need to take it to a repair shop or consider if it’s time for an upgrade.
Internal Component Checks
Dirty or clogged internal components are like having a pebble in your shoe; it’s annoying and stops you in your tracks.
Over time, coffee grounds and mineral buildup from water can clog the inner workings of your Keurig.
Quick Fixes:
- Cleaning Cycle: Run a cleaning cycle with a descaling solution or white vinegar to clear out the buildup.
- Manual Check: If you’re comfortable and your brewer is out of warranty, opening it up to clean parts like the needle or water line can also help. Just make sure it’s unplugged first!
Malfunctioning Buttons and Controls
Sticky or non-responsive buttons can be super frustrating. It’s like your Keurig is ignoring you on purpose.
How to Deal:
- Clean Around Buttons: Sometimes, coffee spills or sticky fingers can make buttons stick. Gently cleaning around them with a damp cloth can help.
- Unstick Buttons: If a button seems stuck, gently wiggle it without forcing it too hard. You don’t want to break it, after all.
- Reset: Some Keurigs have a reset function that can help with glitchy controls. Check your manual for instructions specific to your model.
Why Won’t My Keurig Turn On Even After Trying Different Outlets?
If your Keurig won’t turn on despite trying different outlets, it’s usually a sign of a deeper issue than just a power problem. It could be anything from internal electrical issues, a faulty power cord, to more serious stuff like a damaged motherboard.
Before you start thinking it’s time to say goodbye, make sure it’s not something simple like the machine being locked (if your model has a lock feature) or needing a reset.
Check out the Keurig Coffee Maker on Amazon now!
Can a Faulty Water Reservoir Cause My Keurig Not to Turn On?
Yes, it can. Your Keurig is pretty smart and knows when things aren’t quite right, including when the water reservoir isn’t properly attached or if the sensors that detect the reservoir are dirty or malfunctioning.
If the machine thinks there’s no water available, it won’t start up to avoid burning out. Give the reservoir and its contacts a good clean and make sure it’s snugly in place.
What Should I Do If I Suspect the Control Board Is Damaged?
The control board is like the brain of your Keurig, so if you think it’s damaged, it’s a bit like performing brain surgery. Unless you’re experienced with electronics, it’s best to leave this to the professionals.
Contacting Keurig customer support or taking your machine to a certified repair shop is your safest bet. DIY fixes on something as complex as the control board can lead to more harm than good.
Is It Safe to Try and Fix Electrical Components Myself?
It really depends on your comfort level and expertise with electrical gadgets. Simple fixes like unclogging the needle or cleaning parts are usually fine for most people.
However, when it comes to opening up your Keurig and tinkering with the internals, especially electrical components, caution is key. If you’re not sure what you’re doing, it’s better to seek professional help to avoid damaging your brewer further or, worse, injuring yourself.
How Often Should I Descale My Keurig to Prevent Power Issues?
Regular descaling is crucial for keeping your Keurig running smoothly and preventing all sorts of issues, including power problems caused by mineral buildup.
The general rule of thumb is every 3 to 6 months, but this can vary depending on how hard your water is and how often you use your brewer. If you notice your coffee tastes off or your machine starts acting up, it might be time for a descale.
Summary of Key Points
- Power Check: Always start simple. Check your outlet, power cord, and plug for any obvious issues.
- Reset Routine: A quick reset can work wonders. Unplug, wait, and replug.
- Water Reservoir Woes: Ensure it’s properly seated and sensors are clean.
- Descale to Declutter: Regular descaling keeps the internal passages clear and your coffee tasting great.
- Inspect Internals: Look for any visible signs of damage or clogging, especially around the needle.
When to Seek Professional Help
If you’ve run through the checklist and your Keurig still acts like a stubborn mule, it might be time to call in the cavalry. Here’s when to reach out:
- Control Board Issues: If you suspect the problem is with the brewer’s brain, it’s time for professional diagnostics.
- Electrical Concerns: Messing with wires and circuits without proper knowledge can be dangerous. If the issue seems electrical, seek help.
- Warranty Wonderland: Check if your brewer is still under warranty. Keurig customer service can offer repair or replacement options that won’t cost you extra.
Check out the Keurig Coffee Maker on Amazon now!
Preventative Measures
The best fix is the one you never have to make. Keep your Keurig running smoothly with these preventative steps:
- Regular Cleaning: A clean machine is a happy machine. Keep it tidy, inside and out.
- Frequent Descaling: Mark your calendar for a descaling session every 3 to 6 months, depending on usage and water hardness.
- Proper Use: Follow the manufacturer’s guidelines for use and care. Don’t overfill the water reservoir, and use the right size cups.
- Water Quality: Consider using filtered or bottled water to reduce mineral buildup.
By staying on top of maintenance and knowing when to tackle a fix versus when to call for backup, you’ll keep those morning brews flowing without a hitch.
Remember, a little TLC goes a long way with your Keurig, ensuring you and your coffee maker have many happy mornings together.
Learn How to Make Good Coffee in this article.
Related posts:
 How to Make Coffee in a Coffee Maker
  Ninja Coffee Maker Problems: Learn How to Fix it
  Troubleshooting Instant Pod Coffee Maker Problems
  Oxo Brew Single Serve Pour-Over Coffee Maker
  Antique Turkish Coffee Pot
  4 Cup Drip Coffee Maker
  Best Drip Coffee Maker With Thermal Carafe
  Melitta Drip Coffee Maker