
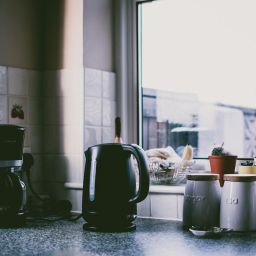
Whether you’re waking up in a tent nestled in the mountains or enjoying a sunrise by the lake, a robust cup of coffee can transform that moment into something magical. Camping coffee percolators have been a staple of outdoor adventures for generations, offering a simple yet effective way to brew your favorite coffee in the great outdoors.
These devices don’t need electricity. All you require is a heat source, water, coffee grounds, and of course, your percolator. It’s a satisfying process that connects you to the basics of brewing, making each cup a rewarding experience. The importance of a good cup of coffee while camping cannot be overstated. It’s not just about the caffeine kick; it’s about the ritual, the aroma, and the warmth that sets the tone for your day amidst nature.
Key Takeaways
- Simplicity is Key: Using a camping coffee percolator is straightforward. Heat, water, and coffee grounds are all it takes to start your day off right.
- Essential Components: You’ll need a few basics: a percolator, fresh water, your favorite coffee grounds, and a heat source. Options for heat include a campfire, a camping stove, or even a portable burner.
- Choosing the Right Coffee: Coarse grounds work best for percolation, minimizing the chance of grounds in your cup and ensuring a smooth flavor.
- Water to Coffee Ratio: Aim for about 1 to 2 tablespoons of coffee per 6 ounces of water, adjusting to taste.
- Watch the Brew: Keep an eye on the percolating process. A perk every few seconds is ideal for avoiding over-extracted or under-extracted coffee.
- Enjoy the Process: Take pleasure in the brewing ritual. It’s part of the camping experience, offering a moment of peace and a delicious reward.
Preparing Your Percolator and Ingredients
Getting ready to use your camping coffee percolator involves a couple of essential steps: selecting the right percolator and coffee beans, and understanding the importance of water quality and how to measure your coffee accurately. Let’s dive into these crucial preparatory steps.
Selecting the Right Percolator and Coffee Beans
Choosing a percolator that suits your camping style is the first step. Stainless steel percolators are durable and ideal for open fires, while enamelware percolators offer a nostalgic touch and work well on camp stoves. Consider the size you’ll need based on your group.
For coffee beans, the consensus among camping enthusiasts is to go with a coarse grind. Coarse grounds are less likely to slip through the percolator basket and into your brew, ensuring a clear, robust cup of coffee. Whether you prefer a light, medium, or dark roast, starting with quality beans and grinding them to the right consistency is key.
Understanding the Importance of Water Quality and Measuring Your Coffee
Water quality can make or break your outdoor coffee experience. Whenever possible, use filtered or bottled water to ensure the purest taste. If you’re drawing water from a natural source, consider boiling it first to eliminate any contaminants that might affect the flavor of your coffee.
Measuring your coffee correctly is crucial for achieving the perfect strength. A general guideline is 1 to 2 tablespoons of coffee grounds per 6 ounces of water, but this can be adjusted to suit your taste. Experimenting with ratios on your first couple of brews can help you find the perfect balance for your palate.
Step-by-Step Brewing Process
Brewing the perfect cup of coffee with a camping percolator is an art that enhances the outdoor experience. Here’s a straightforward guide to mastering this brewing method, from assembly to sipping your first delightful cup.
Assembling Your Percolator
Disassemble the Percolator: Begin by taking apart your percolator if it’s not already. You’ll usually have a pot, a lid, a basket for the grounds, and a tube that connects the basket to the bottom of the pot.
Prepare the Water: Fill the percolator pot with cold water. If your percolator has markings, fill up to the line just below where the basket will sit. The amount of water will dictate how many cups of coffee you can make, so consider your group’s needs.
Adding Coffee and Water
Add Coffee Grounds: Place the basket on the tube, then fill it with coarse ground coffee. The recommended ratio is 1 to 2 tablespoons of coffee per 6 ounces of water, but you can adjust this based on how strong you like your coffee.
Reassemble: Once you’ve added your coffee, put the basket and tube assembly back into the pot. Ensure it’s properly seated, then close the lid securely.
Brewing Over a Heat Source
Heat It Up: Place your percolator over your chosen heat source, be it a campfire, stove, or burner. Start with high heat to bring the water to a boil, then reduce to a simmer. This process is where the magic happens – the water cycles through the grounds, extracting their flavor.
Watch and Listen: Percolation should start shortly. Look for the gentle bubbling of coffee into the glass knob on the lid, if your model has one, or listen for the soft perking sound. This indicates the brewing process is underway.
Adjust Brewing Time: The brewing time affects the strength and flavor of your coffee. Generally, letting it perk for about 7 to 10 minutes yields a balanced flavor. For a stronger brew, extend the time slightly; for a milder cup, reduce the brewing time.
Final Steps and Enjoyment
Remove from Heat: Once your coffee has brewed to your preference, remove the percolator from the heat source. Be careful, as the metal will be very hot.
Let It Rest: Allow the percolator to sit for a minute or two. This lets the grounds settle at the bottom, making for a clearer cup of coffee.
Serve and Enjoy: Carefully pour your freshly brewed coffee into cups and enjoy the fruits of your labor. Adjusting the lid or using a cloth to handle the hot percolator might be necessary to avoid spills.
Post-Brewing Steps
After removing the percolator from the heat, give it a moment. Allowing the coffee grounds to settle at the bottom makes for a smoother pour without the grit.
It’s crucial to clean your percolator after each use. Rinse out the grounds, then wash each component with warm, soapy water. A thorough rinse follows to remove any soap residue. Not only does this practice extend the life of your percolator, but it also ensures your coffee always tastes fresh.
Barista Tips for Percolating Coffee
Grind Size Matters: Use a coarse grind to prevent grounds from slipping through the basket and into your brew. This ensures a clear cup of coffee without sacrificing flavor.
Water Temperature is Key: Start with cold water to promote a gradual and even extraction process. Boiling water can scorch the grounds, leading to a bitter taste.
Regular Maintenance: Regularly check your percolator for any wear or damage, especially if you frequently brew over an open fire. Periodic deep cleaning and checking for clogs in the tube can also enhance your percolator’s performance and coffee flavor.
FAQs
What’s the difference between stovetop and campfire percolators? Stovetop percolators are designed for controlled heat sources like a kitchen stove, while campfire percolators are built to withstand the direct and intense heat of an open flame. Campfire percolators often feature more robust construction and materials to handle the rugged outdoor environment.
Can I use my percolator at home on a regular stove? Yes, most campfire percolators can also be used on a stovetop, but always check the manufacturer’s recommendations to ensure compatibility and safety.
Are there any alternatives to using a percolator for camping coffee? Certainly! For those who might find a percolator cumbersome or prefer a different brewing method, alternatives include French presses, pour-over coffee makers, and even portable espresso machines. Each method offers a unique taste and experience, so it’s worth experimenting to find your favorite.
Final Thoughts
The art of percolated coffee while camping is a tradition that combines the love of the outdoors with the universal appeal of a great cup of coffee. By following the outlined steps and embracing the tips, you’re well-equipped to brew delicious coffee that complements the natural beauty around you. Remember, coffee brewing is as much about the process as it is about the taste. So, take the time to experiment with different grinds, ratios, and brewing times to discover what works best for you. Let your camping coffee percolator be your companion on many adventures, enhancing each morning with a brew that’s uniquely yours.
Related posts:
 How to Make Coffee in a Coffee Maker
  Cuisinart Coffee Maker Not Brewing: Learn How to fix it
  What is the Best Coffee Maker with Grinder? Best Coffee Maker with Grinders
 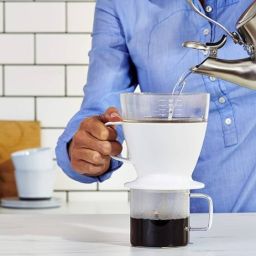 Oxo Brew Single Serve Pour-Over Coffee Maker
 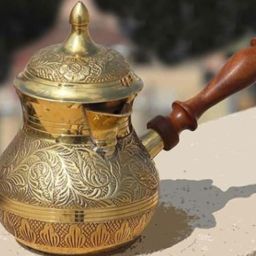 Antique Turkish Coffee Pot
 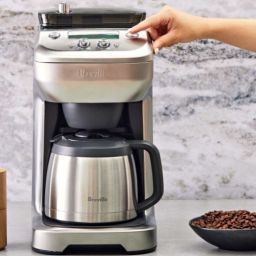 Best Drip Coffee Maker With Thermal Carafe
 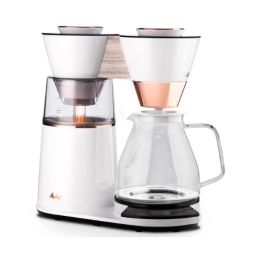 Melitta Drip Coffee Maker