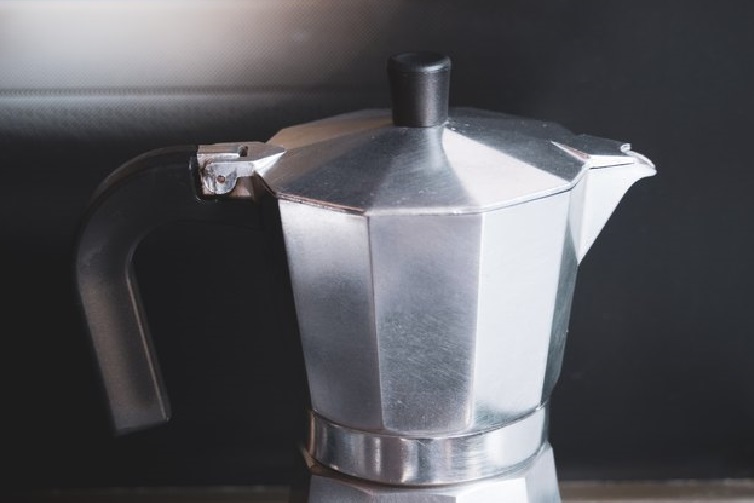
Keeping your stainless steel coffee percolator clean isn’t just about hygiene; it’s about savoring that perfect cup of coffee every time. Dirt or old coffee residue can really mess with your brew’s taste and even shorten the life of your percolator. Let’s dive into how a clean percolator can make your coffee experience better and keep your machine running smoothly for years.
Key Takeaways
- Regular Cleaning is Key: Just like any coffee lover, your percolator loves attention. Regular cleaning ensures every cup is fresh and delicious.
- Choose the Right Cleaners: Harsh chemicals are a no-go! Stick to gentle, non-abrasive cleaners to keep your percolator shiny and happy.
- Rinse Thoroughly: Don’t let soap residue ruin your next brew. A thorough rinse keeps the flavors right.
- Dry It Out: Moisture can lead to mold or rust. Make sure your percolator is completely dry before you store it away.
- Descale Regularly: Water minerals can build up over time. Regular descaling keeps everything flowing smoothly.
- Don’t Forget the Small Parts: The basket and other small parts need love too. Ensure they’re cleaned regularly to avoid clogs or coffee oil buildup.
- Inspect Regularly: Keep an eye out for any signs of wear or damage. Catching issues early can save you from bigger headaches down the road.
Key Steps to Clean a Stainless Steel Coffee Percolator
Cleaning your stainless steel coffee percolator is more than just a chore; it’s a step towards the perfect cup of coffee. Let’s break down the essential steps: rinsing, scrubbing, and drying, to keep your percolator in pristine condition.
Step 1: Rinse Away the Old – Start with a simple rinse. After each use, empty any leftover coffee and give the percolator a good water rinse. This basic step prevents coffee oils and residue from building up, making deeper cleaning sessions easier and less frequent.
Step 2: Gentle Scrubbing – Next up, scrubbing. But hold on, we’re not using any steel wool here! Choose a soft sponge or cloth to avoid scratching the stainless steel. Mix warm water with a mild detergent to create a gentle cleaning solution. Focus on areas where coffee grounds and mineral deposits commonly accumulate, like the basket and the interior walls. For those hard-to-reach spots, a soft-bristled brush is your best friend.
Step 3: Rinse (Again!) – After scrubbing, it’s time to rinse again. You want to ensure all soap residue is gone, as it can affect the taste of your next brew. Run warm water through and over all parts you’ve cleaned, paying special attention to any nooks and crannies where soap suds might hide.
Step 4: Dry It Out – Moisture can be the enemy of stainless steel, leading to water spots or, worse, rust. After rinsing, dry your percolator thoroughly with a soft towel. Don’t forget the inside! Any leftover moisture can encourage mold growth or mineral buildup.
Step 5: Reassemble and Store – Once everything’s dry, reassemble your percolator. Proper reassembly ensures that no coffee grounds or water can sneak into places they shouldn’t be the next time you use it. Store your clean, dry percolator in a dry place until it’s coffee time again.
Detailed Cleaning Methods
When your stainless steel coffee percolator needs a deep clean, you don’t need to look further than your kitchen cabinet. Common household items like vinegar, baking soda, and denture tablets can be your allies in combating tough stains and build-ups. Here’s how you can use these everyday heroes to get your percolator sparkling clean.
Vinegar: The Natural Descaler
Vinegar is a fantastic natural descaler, perfect for tackling mineral build-up in your percolator.
- Mix and Fill: Combine equal parts of water and white vinegar. Fill your percolator with this solution.
- Percolate: Run a brewing cycle. The acidic nature of vinegar helps break down mineral deposits.
- Soak: Let the solution sit in the percolator for about 15-20 minutes post-brewing.
- Rinse Thoroughly: Empty the percolator and rinse it several times with clean water to eliminate any vinegar residue.
Baking Soda: The Gentle Scrubber
Baking soda is gentle yet effective, ideal for scrubbing away stubborn stains without scratching.
- Create a Paste: Mix a few tablespoons of baking soda with water to form a paste.
- Apply and Scrub: Use a soft brush or cloth to apply the paste to stained areas. Scrub gently.
- Rinse: Wash away the paste with warm water, ensuring no baking soda is left behind.
- Run a Water Cycle: Fill the percolator with clean water and run a cycle to flush out any remaining baking soda.
Denture Tablets: The Effervescent Cleaner
Surprisingly, denture tablets can be great for cleaning your percolator, especially for hard-to-reach spots.
- Dissolve the Tablets: Fill the percolator with water and add a couple of denture tablets.
- Wait: Allow the tablets to fully dissolve and the effervescent action to loosen the grime.
- Empty and Scrub: Empty the percolator and scrub lightly to remove any loosened debris.
- Final Rinse: Rinse well with clean water to ensure all cleaning residues are gone.
Combining Forces: Vinegar and Baking Soda
For an even deeper clean, you can combine vinegar and baking soda.
- First Layer: Pour baking soda into the percolator.
- Add Vinegar: Slowly add vinegar to create a fizzing reaction. This reaction helps lift stubborn stains.
- Wait and Rinse: After the fizzing subsides, rinse the percolator thoroughly with warm water.
Denture Tablet Deep Clean
For a deep clean with denture tablets:
- Fill and Add: Fill the percolator with water and add several denture tablets.
- Activate: Let the tablets fully dissolve and sit for an hour or so.
- Scrub if Needed: After the effervescence has done its job, do a quick scrub for any remaining residue.
- Rinse Well: Ensure no cleaning agent remains by thoroughly rinsing the percolator.
Cleaning Specific Parts of the Percolator
Maintaining each part of your percolator is crucial for its overall performance and longevity. Here’s how to tackle the basket, the bong, and the exterior:
Basket:
The basket is where the coffee brewing magic happens, so keeping it clean is a must.
- Soak: Remove the basket and soak it in a mixture of warm water and mild detergent.
- Scrub: Gently scrub with a soft brush or cloth to remove coffee residue and oils.
- Rinse and Dry: Thoroughly rinse with clean water and dry it before reassembling.
Bong:
The bong, or the tube, is essential for the percolation process and can accumulate residue over time.
- Detach and Rinse: If detachable, remove the bong and rinse it under warm water.
- Clean with Brush: Use a narrow brush to scrub the inside, ensuring all residue is removed.
- Rinse and Dry: Rinse well and dry completely before reattaching.
Exterior:
The exterior should not be neglected, as it can gather fingerprints and smudges.
- Wipe: Use a damp cloth with a bit of mild detergent to wipe the exterior.
- Polish: For extra shine, you can use a stainless steel cleaner.
- Dry: Ensure it’s completely dry to avoid water marks.
Troubleshooting Common Cleaning Issues
Sometimes, even with regular cleaning, you might encounter some stubborn issues:
Stuck Coffee Residue:
- Soak: Soak the affected parts in warm soapy water to loosen the residue.
- Scrub: Use a non-abrasive scrubber to gently remove the residue.
Lingering Odors:
- Vinegar Rinse: Run a cycle with a mixture of water and vinegar to neutralize odors.
- Baking Soda: After the vinegar cycle, run another with baking soda to further eliminate any smells.
Mineral Buildup:
- Vinegar Solution: Fill the percolator with a mixture of vinegar and water, run it, then let it sit. This will dissolve mineral deposits.
- Thorough Rinse: After the vinegar treatment, rinse thoroughly with water several times to remove any vinegar taste.
FAQs
Is vinegar or baking soda better for cleaning a percolator?
Both are great! Vinegar is a natural descaler, perfect for removing mineral buildup. Baking soda is ideal for scrubbing away stubborn stains without scratching. Your choice depends on the cleaning task at hand.
How often should I clean my stainless steel coffee percolator?
It’s best to rinse after each use and perform a deep cleaning every month or depending on usage. Regular maintenance ensures great-tasting coffee and extends your percolator’s lifespan.
Can I clean the percolator with dish soap?
Yes, but choose a mild dish soap and ensure you rinse thoroughly afterward to avoid any soap residue affecting your coffee’s taste.
Is it safe to use harsh chemicals for tough stains?
It’s best to avoid harsh chemicals as they can damage the stainless steel. Stick to natural and gentle cleaners like vinegar and baking soda.
Final Thoughts
Keeping your stainless steel coffee percolator clean is not just about hygiene; it’s about ensuring every cup of coffee is as delicious as intended. Regular cleaning with gentle, natural agents like vinegar and baking soda can prevent residue build-up and extend the life of your percolator.
Related posts:
 How to Make Coffee in a Coffee Maker
  Cuisinart Coffee Maker Not Brewing: Learn How to fix it
  What is the Best Coffee Maker with Grinder? Best Coffee Maker with Grinders
  How Much Coffee To Use In Aeropress
  Oxo Brew Single Serve Pour-Over Coffee Maker
 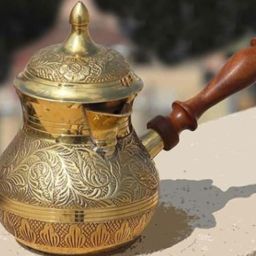 Antique Turkish Coffee Pot
 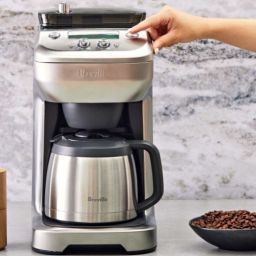 Best Drip Coffee Maker With Thermal Carafe