Percolator coffee brewing is a classic method that has withstood the test of time, known for its robust and richly flavored coffee. This brewing technique, where boiling water cycles through coffee grounds multiple times, requires a specific type of ground coffee to achieve the perfect cup. Choosing the right ground coffee is crucial as it significantly influences the taste, aroma, and overall experience of your coffee.
Key Takeaways
- Roast Type: Medium roast is often preferred for percolators. It strikes a balance, providing enough flavor without the bitterness that darker roasts might introduce in a percolation process.
- Flavor: Consider what flavor profiles you enjoy. Do you prefer a smooth, nutty coffee or one with hints of chocolate and caramel? The brewing method will highlight different aspects of the coffee’s flavor profile.
- Freshness: Fresh coffee makes all the difference. Look for coffee that has a roast date on the packaging and try to use it within a month of that date to enjoy its full flavor potential.
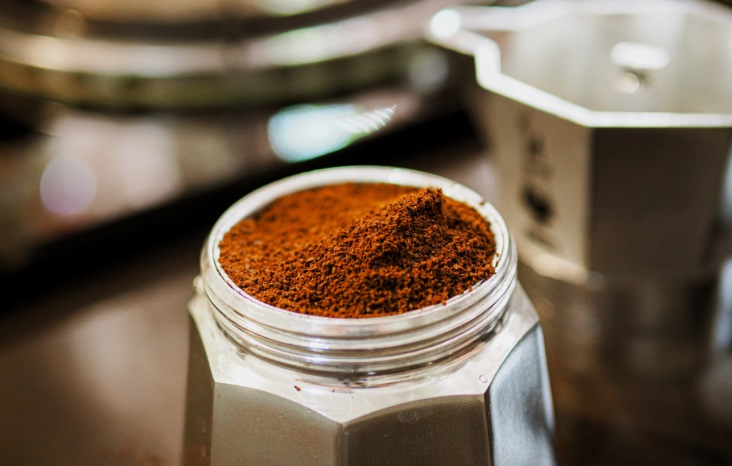
- Grind Size: The grind size should be coarse. A finer grind can lead to over-extraction and a bitter taste, as well as the possibility of grounds making their way into your brew.
Top Ground Coffee Choices for Your Percolator
Exploring the best ground coffee for your percolator can be an exciting journey. Here’s a summary of top selections that have garnered praise for their quality, flavor, and suitability for percolator brewing.
Kicking Horse Coffee ‘Hola’ – Light Roast
- Pros: Coarsely ground, perfect for percolators; organic, Fair Trade, and Kosher certified; rich flavor with notes of chocolate and honey.
- Cons: Some may find the light roast translates to a slightly burnt flavor, potentially leading to bitterness.
Volcanica Guatemala Coffee Antigua – Medium Roast
- Pros: Single-origin, grown in volcanic soil for a unique flavor profile; SHB-certified, ensuring high-quality beans; offers a smooth, less intense brew, perfect for those who prefer a milder cup.
- Cons: Freshness might vary, and some may find the flavor less pronounced.
Café Las Flores Grandes Cosechas – Medium Roast
- Pros: Reasonably priced, with a smooth and never-bitter taste; grown in Nicaragua, providing a unique terroir influence.
- Cons: Lighter side of medium roast, which might be too mild for some; lack of a roast date can make determining freshness challenging.
Starbucks Espresso Roast – Dark Roast
- Pros: Strong and full-bodied, with notes of chocolate and caramel; widely available and reasonably priced.
- Cons: May be too dark and bitter for percolator brewing; lacks the complexity some coffee aficionados seek.
Gevalia Special Reserve – Medium Roast
- Pros: Offers a deep, earthy, and smoky flavor with sweet caramel notes; Rainforest Alliance certification ensures sustainable and ethical production.
- Cons: Some find the caramel notes too subtle, and the packaging sizes might be too small for heavy coffee drinkers.
French Press Specialty Coffee – Medium Roast
- Pros: Hand-harvested and sustainably produced; mild and sweet flavor with subtle citrus notes, allowing for multiple cups without overwhelming caffeine intake.
- Cons: Limited to smaller package sizes due to the meticulous production process.
How to Brew the Perfect Cup with a Percolator
Brewing coffee with a percolator is an art that can yield a deliciously robust cup if done correctly. Here’s a concise step-by-step guide to perfecting your percolated coffee:
- Water: Start by filling the percolator’s reservoir with fresh, cold water up to the desired level.
- Coffee Grounds: Add coarsely ground coffee to the percolator basket. The coarseness prevents grounds from slipping through the basket and ensures optimal extraction.
- Heat: Place the percolator on the stove or plug it in, depending on the type. Heat the water until it starts to percolate.
- Brew Time: Allow the coffee to percolate for about 7 to 10 minutes. Adjust the time based on your strength preference.
- Enjoy: Once brewing is complete, remove the percolator from the heat source, discard the grounds, and pour yourself a cup of freshly brewed coffee.
FAQs
How much coffee should I use in a percolator? A general rule is to use about 1 tablespoon of coffee per 8 ounces of water. Adjust according to taste.
Can I use fine or espresso grind in a percolator? No, it’s best to use a coarse grind to prevent grounds from passing through the filter and to ensure proper extraction.
How long should I percolate my coffee? Typically, 7 to 10 minutes is ideal, but adjust the timing based on how strong you like your coffee.
Can I reuse coffee grounds in a percolator? It’s not recommended as reused grounds will produce a weaker and less flavorful cup of coffee.
Final Thoughts
Choosing the best ground coffee for your percolator is a key step toward enjoying a delightful coffee experience. The roast type, flavor profile, freshness, and grind size significantly impact the taste and quality of your brew. Medium roast coffees are typically favored for percolators, balancing rich flavor without introducing excessive bitterness.
When selecting coffee, consider the pros and cons of each brand or type, such as organic certifications or flavor notes, to align with your personal preferences. The freshness of coffee plays a crucial role, so aim for coffee with a clear roast date and use it within its peak freshness window.
The brewing process itself is straightforward yet crucial. Use coarsely ground coffee to prevent grounds from seeping into your cup and to ensure even extraction. The brewing time is adjustable based on how strong you prefer your coffee, with a general guideline of 7 to 10 minutes.
In summary, experiment with different coffees to discover what best suits your palate. Remember, the perfect cup of coffee is the one that aligns with your taste preferences, brewed to your liking.


