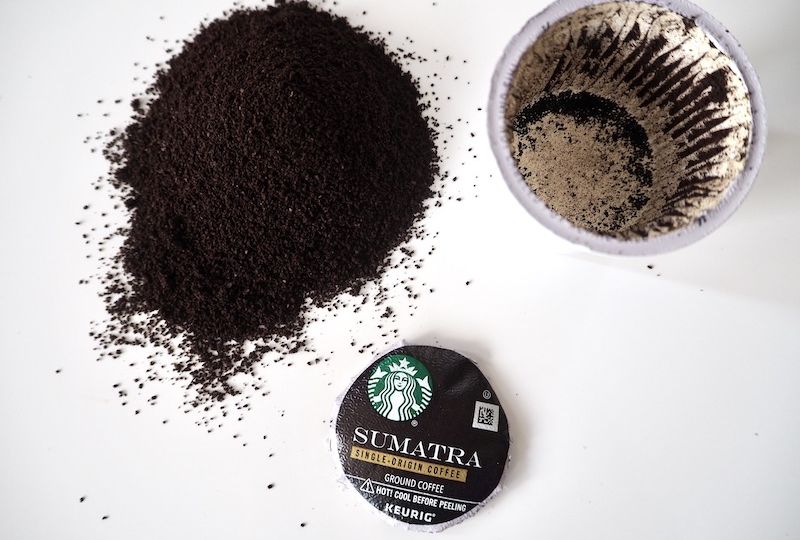
Yes, you can indeed use K-Cups in a regular coffee maker, but with a twist. Instead of popping the K-Cup into the machine, you’ll use the coffee grounds inside it. It’s a handy trick for those moments when you’re craving that specific K-Cup flavor but only have a traditional coffee maker at your disposal.
Key Takeaways
- Open and Brew: You can open a K-Cup and use the coffee grounds in a regular coffee maker, embracing a bit of DIY spirit to get your caffeine fix.
- Multiple Methods: Whether it’s the pour-over technique, crafting a DIY coffee bag, or even the cowboy brewing method, there are several ways to extract that precious K-Cup coffee without a Keurig machine.
- Attention to Detail: This isn’t your usual “pop in and brew” scenario. Using K-Cup grounds in a standard coffee maker requires a bit more attention and care to ensure a tasty cup.
- Creative Alternatives: From tea bags to cowboy brewing, there’s room for creativity in how you brew your K-Cup coffee. These methods are not just about making do; they’re about discovering new ways to enjoy your favorite coffee.
- Getting the Mix Right: The coffee-to-water ratio is crucial. Since K-Cups are designed for a specific amount of water, you’ll need to adjust when using their contents in a different brewing setup.
Using K-Cups in Regular Coffee Makers
Got a K-Cup but no Keurig? No problem! Let’s dive into some ingenious ways you can still enjoy your favorite K-Cup coffee using a regular coffee maker.
Pour-Over Method
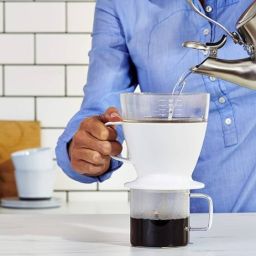
The pour-over technique is a simple yet elegant way to brew coffee. Here’s how you can apply this method with K-Cup grounds:
- Open the K-Cup: Carefully peel off the top and empty the coffee grounds into a filter placed over your coffee mug.
- Boil Water: Heat your water to just below boiling, aiming for around 200°F – the sweet spot for extracting maximum flavor.
- Brew: Slowly pour the hot water over the coffee grounds. Be patient and pour in a circular motion to ensure all grounds are soaked evenly.
- Enjoy: Once all the water has filtered through, your coffee is ready to sip!
DIY Coffee Bag
Feeling crafty? Create your own coffee bag using K-Cup grounds:
- Prepare the Bag: Take a regular coffee filter or a tea bag and fill it with the contents of your K-Cup.
- Secure It: Tie the top of the bag with a string, making sure no grounds can escape.
- Brew: Drop your DIY coffee bag into a cup of hot water. Let it steep for about 4-5 minutes, similar to brewing tea.
- Savor: Remove the bag, and there you have it – a custom brew from your very own coffee bag.
Cowboy Brewing
Ever heard of cowboy coffee? It’s brewing coffee without a coffee maker, and here’s how you can adapt this rugged method for K-Cup grounds:
- Mix Water and Coffee: In a saucepan, heat water and add your K-Cup coffee grounds once it’s hot, but not yet boiling.
- Stir and Steep: Give it a good stir, remove from heat, and let it steep for a few minutes. The grounds should settle at the bottom.
- Pour Carefully: Gently pour the coffee into your mug, avoiding the settled grounds. It’s a bit rustic, but it’s a flavorful adventure!
Pros and Cons
Advantages of Using K-Cups in Regular Coffee Makers
- Variety at Your Fingertips: With K-Cups, you’re not limited to the usual bag of coffee. You can enjoy a range of flavors and brands, one cup at a time.
- No Measurement Needed: K-Cups come pre-measured, taking the guesswork out of how much coffee to use for a single cup.
- Experimentation and Fun: It’s a creative way to experiment with brewing methods and find your personal favorite.
Disadvantages of Using K-Cups in Regular Coffee Makers
Time-Consuming: These methods require more time than simply popping a K-Cup into a Keurig.
Potential for Mess: Especially with methods like cowboy brewing or the pour-over, there’s a higher risk of spilling or creating a mess.
Taste Variation: The flavor might differ from what you’re used to with a Keurig, as the extraction process isn’t the same.
Optimizing Coffee Strength
When it comes to getting the strength of your coffee just right, it’s more art than science when using K-Cups in a regular coffee maker. Here’s a general guide to help you navigate:
Start with One: Begin by using one K-Cup for a standard-sized cup of coffee (about 6 to 8 ounces) and assess the strength.
Adjust to Taste: If the coffee’s too weak, try using two K-Cups for the same amount of water next time. If it’s too strong, reduce the coffee grounds slightly or increase the water.
Keep Notes: Given the manual nature of these brewing methods, keeping a note of what works best for your taste preferences can be incredibly helpful for consistent results.
Alternative Brewing Without a Coffee Maker
No coffee maker? No worries! You can still enjoy K-Cup coffee with a bit of ingenuity:
Manual Pour-Over: Use the K-Cup as a mini pour-over brewer by cutting off the top and placing it over a cup. Slowly pour hot water over the grounds.
Steep Like Tea: Empty the K-Cup contents into a cup, add hot water, and let it steep. Strain before drinking if needed.
Microwave Brewing: Combine the K-Cup contents and water in a microwave-safe cup. Heat, then let it steep, and strain.
FAQs
Is it cost-effective to use K-Cups this way?
While K-Cups might be pricier per cup compared to bulk coffee, using them in a regular coffee maker can be a cost-saving solution if you already have them on hand.
Can I use K-Cups in any coffee maker?
While designed for Keurig machines, K-Cup grounds can be used in any coffee maker with a bit of creativity.
How do I open a K-Cup without making a mess?
Carefully cut around the foil top and ensure you have a container ready for the grounds to avoid spills.
Final Thoughts
Embracing the versatility of K-Cups can add a playful and experimental aspect to your coffee routine. Whether you’re improvising without a coffee maker or simply exploring new brewing methods, K-Cups offer a world of flavors and conveniences waiting to be unlocked. Don’t shy away from experimenting to discover your perfect cup – the journey is as rewarding as the sip!


