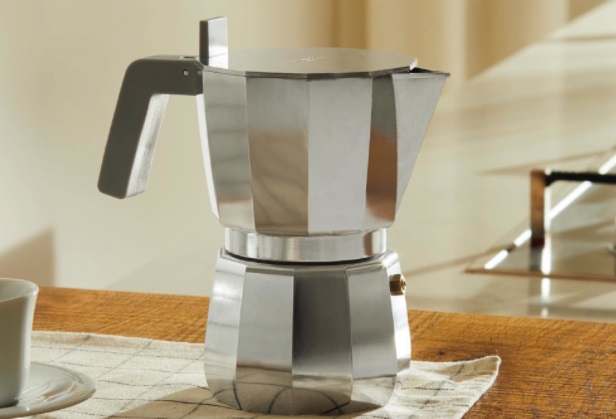
Brewing the perfect cup of coffee is an art, and the tools you use can make all the difference. Enter the coffee percolator—a beloved classic that’s finding new life on modern induction cooktops. Whether you’re a coffee aficionado or just someone who appreciates a good brew, understanding how to pair a percolator with an induction cooktop can elevate your coffee experience. Let’s dive into this harmonious blend of traditional brewing methods and cutting-edge technology, ensuring your morning coffee is not just a drink but an experience.
Key Takeaways
- Compatibility Matters: Not all coffee percolators are suitable for induction cooktops. Ensure your percolator has a magnetic base to be induction-compatible.
- Types of Percolators: Explore the differences between stovetop and electric percolators and how they interact with induction cooktops.
- Benefits of Induction Brewing: Discover the advantages of using an induction cooktop, such as faster heating times and energy efficiency.
- Selection Tips: Learn how to choose the right percolator for your induction cooktop, focusing on material, design, and features.
- Brewing Perfection: Get insights into the brewing process using a percolator on an induction cooktop, ensuring a perfect cup every time.
- Maintenance Is Key: Understand the importance of proper care and maintenance to extend the life of your percolator and maintain coffee quality.
Understanding Induction Cooktops
Induction cooktops are like the tech-savvy cousins of traditional stoves. They use electromagnetic energy to directly heat your pots and pans, rather than heating the cooktop surface itself. This means when you place a compatible pan on an induction cooktop, it heats up super fast, making it a time-saver in the kitchen. Plus, they’re energy-efficient—no more heat wasted into the air around your pot. It’s all about getting the heat where it matters most: to your food.
Compatibility of Percolators with Induction Cooktops
To get your coffee brewing on an induction cooktop, your percolator needs to have a magnetic base. That’s the key. If a magnet sticks to the bottom of your percolator, you’re in business. This is because induction cooktops work with magnetic fields to generate heat. So, your traditional aluminum percolator might not make the cut unless it has a special induction-compatible base. Stainless steel percolators often work well, but it’s always good to check.
Look for percolators labeled as induction-ready, or just grab a magnet and do a quick test. That way, you ensure your morning brew isn’t interrupted by compatibility issues.
Types of Coffee Percolators
In the world of coffee percolators, you’ll find two main types: stovetop and electric. Stovetop percolators hark back to the old-school method of brewing. They require a heat source, like a burner, and a bit of watchfulness to ensure your coffee doesn’t over-extract. Electric percolators, on the other hand, offer a plug-and-play convenience. They regulate the brewing temperature and cycle themselves, making them a set-it-and-forget-it option.
When it comes to induction cooktops, stovetop percolators need to have an induction-compatible base to work. Electric percolators aren’t typically used on cooktops, but if you’re in a pinch, those with a suitable base can also be used on an induction cooktop. The key is ensuring that the material interacts correctly with the induction technology.
Selecting the Right Percolator for Induction Cooktops
Choosing the perfect percolator for an induction cooktop can be a delightful journey into the world of coffee brewing. Here’s a straightforward guide to picking the right one:
- Material Matters: Look for percolators with a magnetic base, usually stainless steel, to ensure compatibility with your induction cooktop.
- Size Does Count: Consider how much coffee you typically brew. Percolators come in various sizes, so pick one that matches your daily needs.
- Ease of Use: Think about whether you prefer the simplicity of a stovetop percolator or the convenience of an electric one. If you go for a stovetop model, make sure it has a clear indicator of when the coffee is ready to avoid over-brewing.
- Brand Reputation: Do a bit of research on brands. Those with a solid reputation for quality in cookware are likely to offer durable and efficient percolators.
- Features to Fancy: Some percolators come with handy features like cool-touch handles or automatic keep-warm functions. Decide which features will enhance your coffee experience.
- Maintenance and Cleaning: Consider how easy the percolator is to clean and maintain. A dishwasher-safe model might save you time and hassle.
How to Use a Percolator on an Induction Cooktop
Brewing coffee with a percolator on an induction cooktop is a satisfying ritual. Here’s how you do it:
- Water First: Fill the percolator’s bottom chamber with water up to the desired level. Don’t overfill—there’s usually a mark inside to guide you.
- Add Coffee: Place the coffee grounds in the percolator’s basket. A general rule is about one tablespoon of coffee per cup of water, but adjust to your taste.
- Assemble: Assemble the percolator, ensuring the basket is correctly in place and the lid is secure.
- Set the Cooktop: Place the percolator on the induction cooktop. Turn it on and set a moderate heat level. Induction cooktops heat quickly, so keep an eye on it.
- Watch for the Brew: When you see or hear the coffee percolating, adjust the heat as necessary. You want a steady, gentle percolation, not a rapid boil.
- Time Your Brew: Let it brew for about 7 to 10 minutes, depending on your taste preference.
- Serve and Enjoy: Once brewing is complete, remove the percolator from the cooktop. Pour and enjoy your freshly brewed coffee.
Care and Maintenance
Keeping your percolator in top shape ensures delicious coffee every time. Here are some care tips:
Regular Cleaning: After each use, disassemble the percolator and wash all parts with warm soapy water. Avoid abrasive cleaners or pads that can scratch the surface.
Descale Periodically: Like all coffee makers, percolators benefit from descaling. Use a vinegar-water solution every few months to remove mineral buildup.
Check for Wear: Inspect the percolator for any signs of wear, especially the seal and the basket. Replace parts as necessary to ensure a proper brew.
Dry Thoroughly: After washing, dry all components thoroughly before reassembling to prevent rust or mildew.
Proper Storage: Store the percolator in a dry place where it won’t get knocked around or damaged.
FAQs
Can all coffee percolators be used on induction cooktops?
Not all percolators are suitable for induction cooktops. Only those with a magnetic base, typically made of stainless steel, can be used.
Does using an induction cooktop change the coffee’s taste?
No, the cooktop doesn’t affect the flavor. It’s the percolator and coffee grounds that determine your coffee’s taste.
How do I know if my percolator is induction-compatible?
Check if a magnet sticks to the base of the percolator. If it does, it’s likely compatible.
Can I adjust the brewing temperature on an induction cooktop?
Yes, one of the advantages of induction cooktops is precise temperature control, allowing for a perfect brew.
Is it faster to brew coffee with a percolator on an induction cooktop?
Yes, induction cooktops heat up faster than traditional stovetops, reducing the overall brewing time.
Final Thoughts
Embracing the combination of a coffee percolator with an induction cooktop can transform your coffee ritual into a swift, efficient, and enjoyable process. With the right induction-compatible percolator, you can harness the rapid heating and precise temperature control of an induction cooktop to brew perfect coffee every time. Whether you prefer the hands-on approach of a stovetop percolator or the convenience of an electric model, the key is ensuring it’s suited for induction cooking.
By selecting the right equipment and following simple brewing guidelines, you can enjoy the rich, comforting aroma of freshly percolated coffee, all while benefiting from the modern efficiency of induction cooking.


