Imagine starting your day with a cup of coffee enriched with a creamy, vanilla-flavored delight. That’s what you get with homemade vanilla coffee creamer made with evaporated milk. It’s a simple yet luxurious addition to your morning ritual, offering a sweet, rich taste that store-bought versions can’t match.
Creating your coffee creamer at home isn’t just about flavor; it’s about control. You choose the ingredients, tailoring the sweetness and vanilla intensity to your liking. Plus, it’s a healthier choice, free from the preservatives and artificial additives found in commercial creamers.
Key Takeaways
- Customization: Adjust sweetness and flavors to your preference.
- Healthier: No added preservatives or artificial ingredients.
- Cost-effective: Homemade creamer can be more economical than store-bought versions.
- Satisfaction: There’s a unique joy in creating and enjoying your homemade products.
- Dairy-free alternatives: Use coconut or almond milk instead of evaporated milk for a vegan version.
- Sugar control: Opt for natural sweeteners like honey or maple syrup instead of sugar.
- Flavor twists: Experiment with cinnamon, nutmeg, or almond extract for different flavor profiles.
Ingredients and Substitutions
To craft your homemade vanilla coffee creamer, you’ll need just a few basic ingredients:
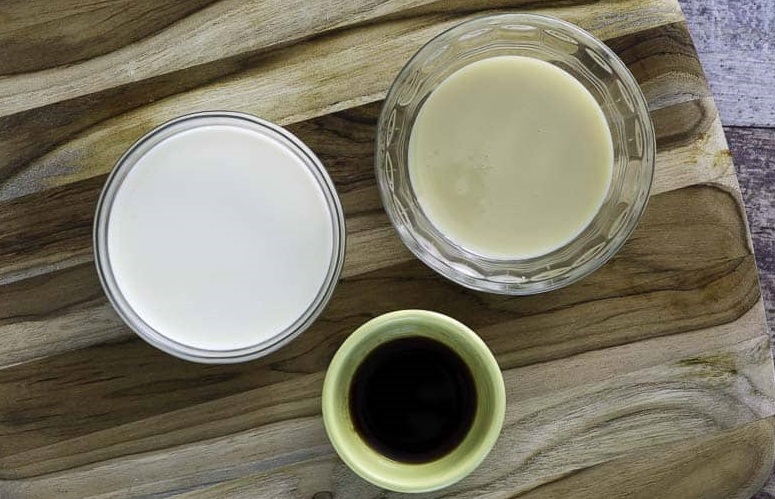
- Evaporated milk: The star player, providing the creamer’s rich base.
- Vanilla extract: For that classic, aromatic vanilla flavor.
- Sweetener of choice: Sugar, honey, or maple syrup to sweeten things up.
Substitution options, including dairy-free:
Customizing your creamer to fit dietary preferences or just to shake things up is easy. Here are some adaptable substitutions:
- Dairy-free milk: Swap evaporated milk with coconut milk or almond milk for a vegan version. These alternatives offer a delightful twist, each adding its unique flavor.
- Natural sweeteners: If you’re looking to avoid refined sugar, natural sweeteners like honey or maple syrup are excellent choices. They add a rich depth of flavor while keeping things sweet.
- Flavor variations: Beyond vanilla, why not explore other extracts? Almond, peppermint, or hazelnut extracts can introduce a whole new dimension to your creamer.
Step-by-Step Instructions
Creating your homemade vanilla coffee creamer with evaporated milk is an easy, rewarding process. Here’s how you can do it in just a few simple steps:
1. Gather Your Ingredients:
- 1 can of evaporated milk
- 2-4 tablespoons of your preferred sweetener (adjust to taste)
- 2 teaspoons of pure vanilla extract
2. Combine the Milk and Sweetener:
In a medium saucepan, pour in the evaporated milk. Add your sweetener of choice. Warm the mixture over medium heat, stirring constantly to dissolve the sweetener completely. There’s no need to boil; just heat enough to blend the sweetener and milk seamlessly.
3. Add Vanilla:
Once the sweetener is fully dissolved and the mixture is warm, remove the saucepan from the heat. Stir in the vanilla extract. The warmth will help infuse the vanilla flavor into the creamer, creating a rich and aromatic profile.
4. Cool Down:
Allow the mixture to cool to room temperature. This step is crucial as it lets the flavors meld together, enhancing the overall taste of your creamer.
5. Store Properly:
Transfer the cooled creamer into a clean, airtight container or bottle. Glass is often preferred as it doesn’t absorb flavors and keeps the creamer fresh. Seal the container and refrigerate.
6. Enjoy:
Shake the container well before each use. Your homemade vanilla coffee creamer is now ready to elevate your coffee experience. Just pour your desired amount into your coffee and savor the rich, vanilla-infused flavor.
7. Customize:
Remember, this recipe is just a starting point. Feel free to adjust the sweetness, vanilla intensity, or even add other flavors to make it uniquely yours.
Flavor Variations and Enhancements
Your homemade vanilla coffee creamer is a blank canvas for flavor experimentation. Here are some delightful variations to try:
- Cinnamon Spice: Add a teaspoon of ground cinnamon for a warm, spicy twist.
- Chocolate Delight: Mix in 2 tablespoons of cocoa powder for a chocolatey touch.
- Caramel Infusion: Stir in 2 tablespoons of caramel sauce for a rich, decadent flavor.
- Nutty Hazelnut: Blend in a teaspoon of hazelnut extract for a nutty, aromatic creamer.
- Pumpkin Spice: Incorporate a teaspoon of pumpkin spice mix to capture the essence of fall.
Each addition creates a unique flavor profile, allowing you to enjoy a different coffee experience every time.
Creating a Signature Creamer:
- Experiment: Don’t be afraid to try various combinations of flavors. Mix and match extracts, spices, or syrups to find what delights your palate.
- Balance: Start with small amounts of flavor additives and taste as you go. It’s easier to add more than to correct an overly flavored creamer.
- Seasonal Touches: Embrace the seasons by incorporating seasonal flavors like peppermint in winter or citrus in summer.
- Personal Taste: Consider what you love about coffee and desserts. If you adore a certain flavor in sweets, chances are it’ll make a great creamer.
Storage and Shelf Life
Store your homemade creamer in an airtight container in the refrigerator to maintain its freshness. Glass jars are ideal as they don’t absorb odors or flavors, ensuring your creamer retains its intended taste. Always give the container a good shake before using, as ingredients may separate over time.
Typically, homemade creamer can last about 1-2 weeks in the refrigerator. The exact shelf life depends on the freshness of your ingredients, especially the milk or milk substitute used. If you notice any changes in texture, smell, or taste, it’s best to discard the creamer to avoid consuming spoiled products.
Comparison With Store-Bought Creamers
Homemade creamers have a clear advantage as they’re free from artificial preservatives, flavors, and excessive sugars found in many commercial creamers. You control the ingredients, making it easier to fit your dietary preferences or restrictions.
Taste is subjective, but many find homemade creamers superior due to their freshness and the ability to adjust flavors to personal preferences. They lack the chemical aftertaste some store-bought creamers have, offering a more natural and satisfying flavor profile.
User Experiences and Tips
Users who make their creamers often highlight the joy of customization, noting how they can create flavors that aren’t available in stores or adjust sweetness to their liking. Many suggest starting with basic recipes and experimenting with different extracts, spices, or sweeteners to find what works best for you. Listening to feedback from family or friends who try your creamer can also provide insights for adjustments, ensuring each batch is better than the last.
FAQs
Can I use skim milk instead of evaporated milk?
Absolutely! Skim milk can be used as a lighter alternative to evaporated milk. While the creamer may be less rich, it’s a great option for those looking for a lower-fat version.
How long is homemade creamer good for?
Homemade creamer typically lasts 1-2 weeks in the fridge. Ensure it’s stored properly in an airtight container, and always check for signs of spoilage before use.
Can I add alcohol for an adult version?
Yes, you can add alcohol like Baileys or Kahlua to create an adult version of your creamer. Just ensure to add it after the heating process to retain the alcohol content.
Final Thoughts
Making your homemade vanilla coffee creamer with evaporated milk is a simple, satisfying process that allows for a wealth of customization. From choosing your base and sweeteners to adding unique flavors, you create a creamer that’s perfectly suited to your taste. Not only does this homemade alternative offer a healthier option without preservatives and artificial additives, but it also provides an unmatched freshness and taste.


