When diving into the world of percolator coffee, one of the first questions that springs to mind is: “How much coffee do I use for a 12-cup percolator?” The answer isn’t as straightforward as you might think, but don’t worry, we’ve got you covered. A general guideline to start with is 1 tablespoon of coffee per 6 ounces of water for a standard strength cup of coffee. This ratio can be tweaked to suit your personal taste, whether you prefer your brew stronger or milder.
Key Takeaways
- The Basics of Using a Percolator and Types (Electric vs. Stovetop): Get to know your percolator inside and out, including the differences between electric and stovetop models.
- Optimal Coffee-to-Water Ratios for the Perfect Brew: Learn the golden ratios that promise a delicious cup every time.
- Adjusting Coffee Strength to Personal Preference: Find out how to tweak your brew to hit that sweet spot of strength and flavor that’s just right for you.
- Importance of Grind Size and Water Temperature: Discover why the size of your coffee grinds and the temperature of your water matter more than you might think.
- Tips for Using and Maintaining Your Percolator: Ensure your percolator stays in top shape with these handy tips and tricks.
Understanding Percolators
Percolators have a charm that blends simplicity with the ritual of brewing coffee, making the process almost as enjoyable as the first sip of the brew itself. These classic devices come in two main types: electric and stovetop, each with its unique method of bringing your coffee to life.
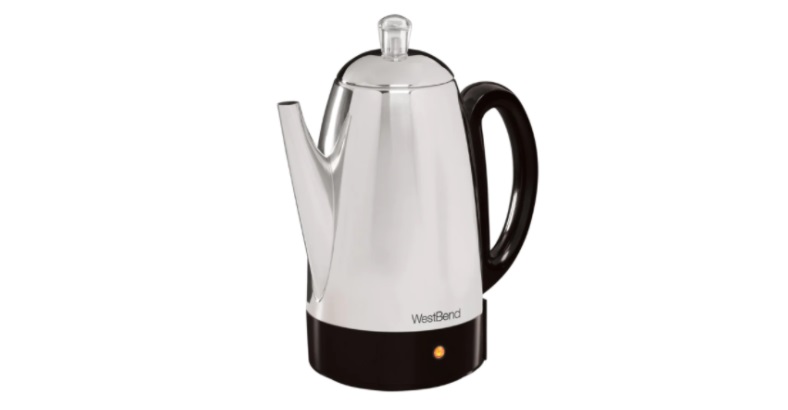
Electric Percolators are the modern twist on the traditional coffee brewing method. They take the guesswork out of the process by controlling the temperature and brewing time automatically. Just add water and coffee, plug it in, and let the machine do its magic. It’s perfect for those who appreciate the percolator’s brew but prefer a set-it-and-forget-it approach.
Stovetop Percolators, on the other hand, call for a more hands-on brewing experience. They work by heating water in a bottom chamber until it’s forced up a tube and over the coffee grounds, repeating the cycle until your coffee reaches the desired strength. It’s a method that requires attention — you control the heat and thus the brewing speed — but the reward is a rich and robust cup of coffee that feels like a nod to a simpler time.
Both types consist of a few key parts: the pot, a water chamber at the bottom, a coffee basket for your grounds, and a tube that connects the bottom chamber to the top where the coffee collects. The percolation process, which involves cycling boiling water through the coffee grounds multiple times, extracts a full-flavored and often stronger brew compared to other methods.
Perfecting the Brew: Ratios, Grind, Water, and Time
Brewing the perfect cup of coffee in a percolator isn’t just about throwing water and coffee together and hoping for the best. It’s about understanding and controlling the elements that go into brewing. Let’s break down these elements to help you achieve that perfect cup.
Coffee-to-Water Ratios
Getting the ratio of coffee to water right is crucial. Too much coffee, and you’ll have a brew that’s too strong and possibly bitter. Not enough, and you’ll end up with a weak and unsatisfying cup. A good starting point is using 1 tablespoon of coffee for every 6 ounces of water. This is a standard guideline, but don’t be afraid to adjust based on your taste preferences. Some people prefer a stronger cup and might opt for a slightly higher ratio of coffee to water.
The Coarseness of the Grind
The grind of your coffee also plays a significant role in the brewing process. For percolators, a medium-coarse to coarse grind works best. This size ensures that the water can extract the coffee flavors effectively without pulling through too much bitterness or leaving sediment in your cup. If you find your coffee is too weak or strong, adjusting the grind size can be a good first step before changing the amount of coffee or water you use.
Water Temperature
The ideal brewing temperature for coffee is around 200°F (about 93°C). At this temperature, the water is hot enough to extract the coffee flavors effectively without scalding the coffee and making it bitter. Electric percolators will typically take care of the temperature for you, but if you’re using a stovetop model, you might need to use a kitchen thermometer until you get a feel for the right heat setting on your stove.
Brewing Time
How long you let your coffee percolate will affect its strength and flavor. A general rule of thumb is to let your coffee percolate for about 7 to 10 minutes. If you prefer a stronger brew, you can let it percolate a bit longer, but be careful not to over-extract, as this can lead to bitterness. Finding the right balance might require some experimentation, but once you find your sweet spot, you’ll be rewarded with a consistently delicious cup every time.
How to Brew in an Electric Percolator
Brewing coffee in an electric percolator is a straightforward process that leads to a deliciously robust cup. Here’s how you can master it:
- Grind Your Coffee: Aim for a coarse grind to ensure the best extraction and avoid sediment in your brew.
- Fill the Water Chamber: Use cold, fresh water to fill up the percolator’s water chamber up to the desired level, corresponding to the number of cups you want to make.
- Add Coffee to Basket: Place the ground coffee into the percolator’s basket. The standard measure is 1 tablespoon of coffee for every 6 ounces of water, but adjust according to your taste preference.
- Assemble and Start: With the coffee and water in place, assemble your percolator if needed, then plug it in and switch it on. The percolator will heat the water and begin the brewing cycle.
- Brewing Cycle: The electric percolator will automatically control the brewing time and temperature. Most models will also switch to a ‘keep warm’ mode once brewing is complete.
- Enjoy: Once the brewing cycle is complete, carefully pour yourself a cup of freshly perked coffee and enjoy!
Brewing with a Stovetop Percolator
Brewing with a stovetop percolator requires a bit more attention but is well worth the effort for the rich coffee it produces:
- Measure and Grind Beans: Start by measuring your coffee beans, then grind them to a coarse consistency to avoid grounds in your cup.
- Add Water: Fill the bottom chamber of your percolator with cold water up to the level corresponding to the amount of coffee you wish to brew.
- Add Coffee to Basket: Place the ground coffee in the percolator’s basket. Remember, a general guideline is 1 tablespoon per 6 ounces of water.
- Heat: Place the percolator on the stove and heat it over a medium setting. Watch for the water to start percolating, which means it’s passing through the coffee grounds.
- Brew Time: Once you see the coffee bubbling up into the globe at the top, reduce the heat. A typical brew should take about 7 to 10 minutes, but adjust according to how strong you like your coffee.
- Ready to Serve: After brewing, remove the percolator from the heat. Give it a moment before serving to allow the grounds to settle. Then, pour and savor the rich taste of stovetop percolated coffee.
Choosing the Right Coffee and Grind Size
Selecting the right coffee and grind size is key to the perfect percolator brew. Coarse grinds are your best bet, as they ensure optimal flavor extraction without the bitterness. Plus, a coarser grind prevents the grounds from slipping through the basket and into your coffee. Whether you’re a fan of bold and robust flavors or something smoother and lighter, starting with quality beans and the right grind can make all the difference.
Maintenance and Safety Tips
Keeping your percolator in tip-top shape not only ensures the longevity of your brewer but also your safety. Regular cleaning is a must—ensure all parts are disassembled and washed thoroughly after each use to prevent coffee oil buildup. Also, never leave your percolator unattended while in use, especially on the stove, to avoid accidents. By following these simple steps, you can enjoy countless cups of delicious coffee without a hitch.
FAQs
Can I adjust the strength of my coffee? Absolutely! Experiment with the coffee-to-water ratio or brewing time to find your perfect strength.
Is it okay to use regular ground coffee? While a coarser grind is recommended for percolators, using a filter can allow for the use of regular ground coffee. Just be mindful of potential sediment.
How does percolator coffee differ from drip coffee? Percolator coffee is often stronger and more robust due to the brewing process, which repeatedly cycles water through the grounds, as opposed to drip coffee where water passes through the grounds just once.
Final Thoughts
Crafting the perfect cup of percolator coffee is an art that comes with patience and a bit of experimentation. Remember, the key to a great brew lies in the coffee-to-water ratio, the grind size, water temperature, and brewing time. Embrace the process and adjust these elements to suit your taste.