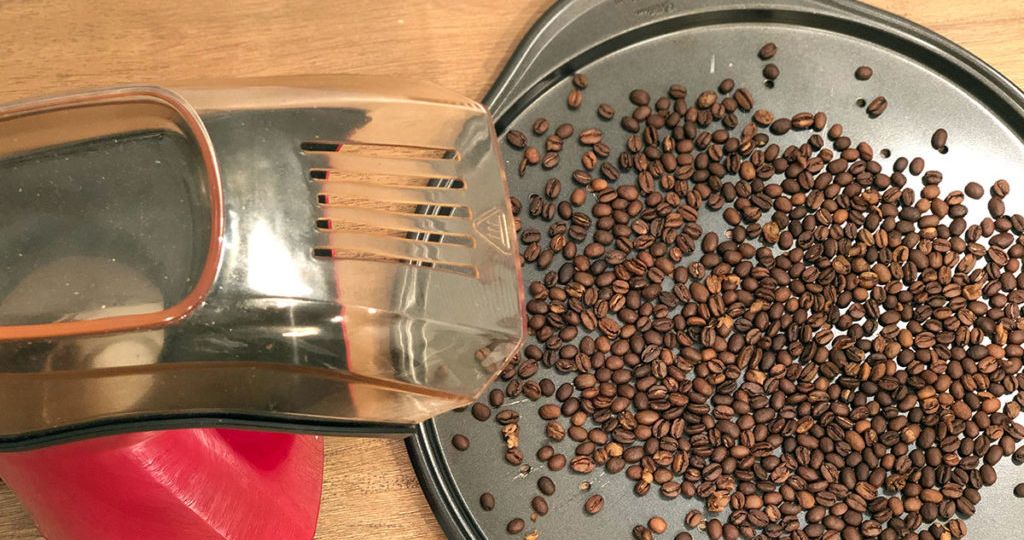
Roasting coffee at home is an enriching experience that offers coffee lovers the chance to craft their perfect cup from bean to brew. It not only allows enthusiasts to experiment with flavors and roasts but also ensures the freshest coffee experience possible.
Amidst various methods available for home roasting, using a popcorn popper has emerged as a remarkably affordable and accessible technique. This method democratizes the coffee roasting process, making it possible for almost anyone to roast their beans at home with minimal investment and straightforward processes.
Choosing the Right Popcorn Popper
Not all popcorn poppers are suitable for coffee roasting. The ideal popcorn popper for this purpose is one that uses hot air to pop the corn, as it offers consistent heat necessary for roasting coffee beans evenly. When selecting a popcorn popper, consider models that allow for easy control and observation of the beans, have adequate ventilation, and can maintain the high temperatures needed for roasting.
Recommended models include the West Bend Poppery II and the Presto PopLite, both known for their durability and efficiency in evenly roasting coffee beans.
Selecting Coffee Beans
The source of your green coffee beans significantly influences the final taste of your coffee. Online retailers such as Amazon, Etsy, and specialty coffee suppliers offer a wide variety of green coffee beans, catering to different preferences and roast profiles.
When choosing beans, consider the origin, variety, and the intended roast level. Each bean brings its unique flavors and characteristics to the cup, influenced by its growing conditions and processing method.
Necessary Equipment and Safety Precautions
In addition to a suitable popcorn popper and green coffee beans, a few essential tools are required for successful home roasting. These include a wooden spoon for stirring, a large bowl for catching chaff, a colander or two for cooling the beans, and an oven mitt to protect your hand from the heat.
Safety is paramount during roasting; always roast in a well-ventilated area to avoid smoke accumulation, keep a fire extinguisher nearby as a precaution, and never leave the popper unattended during the roasting process.
Roasting Process
Roasting coffee beans in a popcorn popper is a straightforward process that involves preparation, the actual roasting, and subsequent cooling and storing of the beans. By following these steps, you can achieve a range of roasts from light to dark, depending on your preference.
Step 1: Setup and Preheat
Setting Up Your Roasting Station: Choose a well-ventilated area to set up your roasting station, ideally under a kitchen vent or near an open window. Place your popcorn popper on a stable, heat-resistant surface. Have all necessary equipment within reach: a wooden spoon, a large bowl for catching chaff, colanders for cooling the beans, and an oven mitt.
Preheating the Popcorn Popper: Plug in your popcorn popper and allow it to preheat for about 30 seconds to 1 minute. Preheating the popper ensures a more consistent roast by starting the roasting process at the ideal temperature.
Step 2: Roasting the Coffee Beans
Adding Beans and Starting the Roast: Measure out your green coffee beans (usually about a half cup, depending on the size of your popper). Carefully pour the beans into the preheated popper and start the machine. Use a wooden spoon to stir the beans continuously, ensuring even exposure to heat and preventing any beans from burning.
Monitoring the Roasting Process: Pay close attention to the color and smell of the beans, as well as the sounds they make. Coffee roasting goes through several stages, marked by two main events known as “cracks.” The first crack signifies the beans have reached a light roast, and a second crack indicates a medium to dark roast. The beans will change from green to yellow and then to varying shades of brown. Listening for these cracks, alongside observing the color change, will guide you in achieving your desired roast level.
Step 3: Cooling and Storing
Cooling the Beans Quickly: Once the beans have reached your desired roast, immediately remove them from the popper and transfer them to a colander or two, which allows for air to circulate around the beans, cooling them quickly. Stir the beans or shake the colander to expedite the cooling process. Cooling the beans quickly stops the roasting process and preserves the desired roast level.
Storing Roasted Coffee Beans: After the beans have cooled, store them in an airtight container. However, freshly roasted beans release carbon dioxide, so it’s beneficial to use a one-way valve coffee bag or simply leave the container slightly open for the first 12 to 24 hours. After this period, ensure the container is sealed to maintain freshness. Roasted coffee beans are best enjoyed within two weeks of roasting for optimal flavor and aroma.
Adjusting Roast Levels
Achieving the perfect roast level—light, medium, or dark—depends on monitoring the time and temperature closely. Light roasts are typically achieved shortly after the first crack, offering a higher acidity and preserving the bean’s original flavor.
For a medium roast, wait until just after the first crack has concluded, which will provide a balanced flavor profile. Dark roasts require pushing past the second crack, resulting in a bolder, more robust flavor with less acidity.
To customize the flavor and achieve your desired roast profile, experiment with the roasting time and temperature. Small adjustments can lead to significant differences in taste. Keep detailed notes on your roasting times and outcomes to replicate successful roasts in the future.
Troubleshooting Common Issues
Uneven roasts often result from inadequate stirring or an uneven heat source. Ensure constant movement of the beans and check your popper’s heat distribution. If roasting times are too fast or too slow, adjust the amount of beans you’re roasting at a time. A smaller batch increases air flow and heat exposure, speeding up the process, while a larger batch does the opposite.
Advantages of Home Roasting
Home roasting offers unparalleled freshness and flavor customization, allowing enthusiasts to experiment with different beans and roast profiles. It’s also cost-efficient, as green beans are generally cheaper than pre-roasted coffee. The enjoyment of the roasting process itself, with its hands-on approach and the satisfaction of brewing coffee you’ve roasted personally, adds to its appeal.
Challenges of Using a Popcorn Popper
However, using a popcorn popper comes with its batch size limitations—most can only roast small quantities at a time. This limitation can be a drawback for those looking to roast large batches. Additionally, the lack of precise temperature controls can make achieving consistent results challenging.
To overcome these challenges, focus on mastering the process with the equipment you have. Experiment with batch sizes to find the optimal amount that your popper can handle efficiently. Understanding your popper’s quirks and learning how to adapt your roasting technique can lead to consistently successful batches, despite the inherent limitations of the device.
FAQs
Q: What types of beans are best for roasting in a popcorn popper?
A: Any green coffee bean can be roasted in a popcorn popper. However, beans with a uniform size and density will roast more evenly. Experiment with beans from different regions to find your preferred flavor profile.
Q: How long does it take to roast coffee beans in a popcorn popper?
A: Roasting time can vary but generally falls between 5 to 10 minutes. Light roasts may take closer to 5 minutes, while darker roasts can take up to 10 minutes. Listening for the “cracks” will help you gauge the roast level.
Q: How should I store coffee beans after roasting?
A: Store roasted beans in an airtight container at room temperature. For optimal freshness, use a container with a one-way valve and consume the beans within two weeks of roasting.
Conclusion
Roasting coffee beans in a popcorn popper is an accessible and rewarding method for achieving fresh, customized coffee at home. By following the outlined steps—from preparation and roasting to cooling and storing—you can master home roasting with minimal equipment.
Experimentation is key; try different beans and adjust roasting levels to discover your perfect cup of coffee. Embrace the process and enjoy the journey to becoming your home barista.


