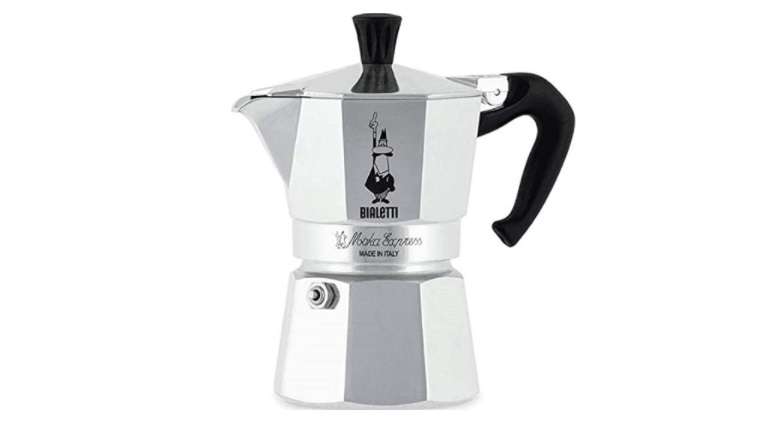
This classic brewing method, beloved by generations, offers a straightforward path to a robust and flavorful cup of coffee. It bypasses the bells and whistles of modern coffee makers, inviting users to engage in a more hands-on coffee brewing experience. The process, which involves percolating water through coffee grounds to extract their flavors, is not just about making coffee; it’s a ritual that harks back to a simpler era. In this guide, we’ll rediscover the stovetop coffee percolator, focusing on essential tips and techniques to brew the perfect cup every time.
Key Takeaways
Brewing coffee with a stovetop percolator is both an art and a science. Here are some key aspects to ensure your brew is as delightful as intended:
- The Ideal Coffee-to-Water Ratio: Start with a basic ratio of one tablespoon of coffee for every cup (8 ounces) of water. This ratio is a solid starting point, but feel free to adjust based on your taste preferences.
- The Importance of Water Temperature: The perfect brewing temperature is between 195 and 205 degrees Fahrenheit. Control the heat to ensure the water is hot enough without boiling, to avoid a burnt taste.
- The Significance of Grind Size: Use a coarse grind for your coffee beans. Too fine a grind can lead to bitter coffee and sediment in your cup. A coarse grind ensures a clear, flavorful brew.
- Tips for Achieving the Perfect Brew Strength: Adjust the brewing time to suit your taste. Generally, allowing the coffee to perk for about 7 to 10 minutes yields a strong, flavorful brew. Watch the percolator’s knob; a bubble every few seconds is just right.
- Cleaning and Maintenance Advice: Regular cleaning is crucial for maintaining the quality of your coffee and the longevity of your percolator. Use warm soapy water for daily cleaning and consider a vinegar soak or baking soda scrub for a deeper clean.
Preparing Your Percolator
Before diving into the art of coffee brewing, ensuring your percolator is clean is paramount. A clean percolator not only guarantees the purity of your coffee’s flavor but also extends the life of your brewing equipment. Residue from previous brews can impart unwanted flavors into your coffee, so starting with a spotless percolator sets the stage for a perfect cup. Use warm, soapy water for a regular clean, and consider a vinegar solution for a deeper cleanse, especially if you’re dealing with stubborn stains or buildup.
Equally important is the choice of coffee beans. Opting for high-quality coffee beans can dramatically improve the taste of your coffee. Freshness is key, so look for beans that have been roasted within the past month and store them properly to maintain their flavor. The type of bean (Arabica vs. Robusta), the roast level, and the origin all contribute to the coffee’s final taste profile, so experiment with different beans to discover what you enjoy most.
Measuring and Grinding Coffee
Measuring your coffee correctly is the first step toward achieving the perfect brew. A general guideline is to use one tablespoon of coffee for every 8 ounces of water. This ratio is a good starting point, but don’t be afraid to adjust according to your taste preferences. Some might prefer a stronger cup, requiring a bit more coffee, while others might enjoy a lighter brew.
The grind size of your coffee beans plays a critical role in the brewing process. For stovetop percolators, a coarse grind is recommended to prevent grounds from slipping through the basket and to ensure optimal extraction. If the grind is too fine, it can lead to over-extraction, resulting in bitter coffee. Conversely, too coarse a grind might under-extract, leading to weak coffee. If you’re grinding your beans at home, aim for a consistency that’s somewhat chunky, resembling kosher salt.
Filling the Percolator
Getting your stovetop percolator ready for brewing starts with adding the right amount of water and coffee. First, fill the reservoir with cold water up to the desired level, usually indicated by a line or marker inside the percolator. Remember, cold water is crucial as it ensures a gradual and even heating, which is key to extracting the best flavor from your coffee.
Next, add your ground coffee to the percolator basket. Stick to the golden ratio of one tablespoon of coffee for every 8 ounces of water, adjusting according to your taste preference for a stronger or lighter brew. Ensure that the coffee grounds are evenly spread in the basket to facilitate uniform extraction during brewing.
The Brewing Process
Brewing coffee in a stovetop percolator is a blend of science and art, requiring attention to detail and a bit of patience. Begin by placing your filled percolator on the stove over a low to medium heat. It’s important to start with a lower temperature to prevent the water from boiling too quickly, which can result in a bitter taste.
As the water heats, it will begin to move up the tube and over the coffee grounds, starting the brewing process. Watch for the gentle bubbling or “perking” visible through the percolator’s glass knob. Adjust the heat as necessary to maintain a steady, slow perk, which is essential for optimal flavor extraction. The bubbling should be consistent but not too rapid; aim for a bubble every few seconds.
The total brewing time can vary based on your taste preferences, but a good starting point is about 7 to 10 minutes. Some coffee aficionados prefer a shorter brew time for a lighter taste, while others might extend it slightly for a stronger brew. It’s worth experimenting with different times to find your perfect balance.
Once the brewing time is up, immediately remove the percolator from the heat to prevent over-extraction, which can lead to bitterness. Let it sit for a moment to allow the coffee to settle, then carefully remove the basket with the used grounds to avoid any grounds ending up in your cup.
Finishing Touches
Once your coffee is brewed to perfection, the next steps are crucial for a clean cup. Carefully remove the basket containing the used coffee grounds from the percolator. Most models feature a basket designed for easy removal, preventing any grounds from slipping into your brew. Dispose of the grounds—consider composting them for an eco-friendly option. Now, your coffee is ready to be served. Pour it into your favorite mug and enjoy the rich, aromatic flavors that only a stovetop percolator can provide.
Cleaning Your Percolator
Keeping your percolator clean is not just about maintaining its appearance; it’s about ensuring each cup of coffee tastes as good as the last. Start with a basic cleaning after each use: empty any remaining coffee and rinse the percolator with warm water. Use a soft sponge with mild detergent to clean the inside and outside of the pot, including the basket and stem.
For a deeper clean, especially needed to remove built-up coffee oils and potential mineral deposits from hard water, use a mixture of water and white vinegar. Fill the percolator with this solution and let it brew halfway, then turn off the heat and let it sit for about an hour. Rinse thoroughly with fresh water afterward. If you encounter stubborn stains, a baking soda paste can be applied directly to the affected areas, providing a gentle yet effective scrubbing action.
FAQs
Can I use finely ground coffee in a percolator? It’s best to avoid finely ground coffee in a stovetop percolator. A coarse grind is ideal to prevent grounds from passing through the basket and into your brew, which can lead to a bitter taste.
How do I know when the coffee is done brewing in a percolator? Watch for the bubbling or “perking” through the glass knob on the percolator’s lid. A steady, gentle perk every few seconds for 7-10 minutes is typically a good indicator. Adjust brewing time based on your preference for stronger or milder coffee.
Is it safe to leave the percolator on the stove? While brewing, it should be safe, but never leave it unattended. Once brewing is complete, immediately remove the percolator from the heat source to avoid over-extraction or burning the coffee.
Can I reheat coffee in a percolator? Reheating coffee in a percolator is not recommended as it can alter the flavor unfavorably. It’s best to enjoy freshly brewed coffee or consider using an insulated flask to keep it warm.
Final Thoughts
Using a stovetop coffee percolator is a delightful way to brew coffee that combines simplicity with the ritual of brewing. By following the key points discussed—selecting high-quality coffee beans, using the right coffee-to-water ratio, achieving the perfect grind size, adjusting brewing times for desired strength, and keeping your percolator clean—you can enjoy rich and aromatic coffee every time.
The stovetop percolator not only offers a nod to traditional coffee-making methods but also allows for a hands-on brewing experience that modern automatic machines can’t match.
Related posts:
 What is a Macchiato and how to make it
  How to Make Coffee in a Coffee Maker
 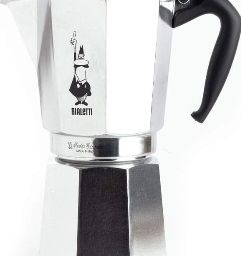 How To Use A Stovetop Coffee Maker
 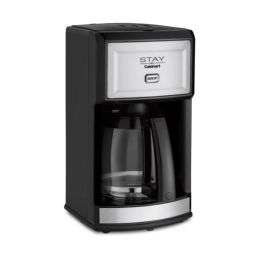 Stay By Cuisinart Coffee Maker How To Use
  How To Use A Coffee Urn
  How To Use Intelligent Blends Coffee Maker
  How To Use Maca Powder In Coffee
  How To Use Hamilton Beach Commercial Coffee Maker