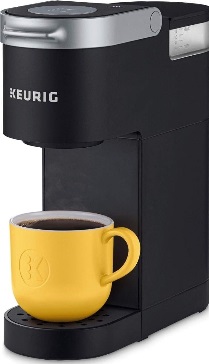
The Keurig Mini is a compact, user-friendly coffee maker designed for convenience and quick coffee brewing. It’s perfect for small spaces and offers a straightforward brewing process, allowing you to enjoy your favorite cup of coffee in minutes. Understanding how to use the Keurig Mini not only enhances your coffee experience but also ensures the longevity and optimal performance of your device.
Key Takeaways
- Choosing Your Coffee: Discover the variety of K-Cups available and how to use a reusable filter for your own coffee blends.
- Initial Setup: Step-by-step guidance on setting up your Keurig Mini for the first time.
- Brewing Process: Detailed instructions to brew your perfect cup of coffee every time.
- Maintenance Tips: Learn how to clean and maintain your Keurig Mini to ensure it keeps running smoothly.
- Troubleshooting: Solutions to common issues you might encounter with your device.
- FAQs: Quick answers to frequently asked questions about the Keurig Mini, helping you resolve doubts and enhance your coffee-making experience.
Unboxing and Initial Setup
Excited to start using your Keurig Mini? First, carefully unbox the machine, removing all packaging materials. Find a suitable spot on your countertop or coffee station — somewhere accessible but out of the way of heavy kitchen traffic. Before plugging it in, make sure to remove any adhesive or packaging inside and outside the brewer.
Connecting to Power and Placement
Plug your Keurig Mini into a power outlet, ensuring the cord isn’t stretched across walkways to avoid tripping hazards. Position your coffee maker close to the outlet to keep your space neat and safe. Now, you’re almost ready to brew your first cup!
Choosing a K-Cup or Using a Reusable Filter
Selecting the right K-Cup is like picking your favorite candy from a candy store – there’s something for everyone! From bold espressos to light roasts, or even hot cocoa and teas, your options are endless. If you’re environmentally conscious or have a favorite ground coffee, opt for a reusable K-Cup filter. This not only reduces waste but allows you to customize your brew strength and flavor.
Filling the Reservoir and Positioning the Cup
Fill your favorite mug with water (not too hot or cold) and pour it into the Keurig Mini’s reservoir. This ensures you brew just the right amount for your cup. Place your mug on the drip tray, ensuring it’s centered to catch every drop of your delicious brew. Now, lift the handle, insert your chosen K-Cup or reusable filter, and lower the handle to lock in the flavor. Hit the brew button and get ready to indulge in a cup of coffee made just for you!
Brewing with the Keurig Mini
Brewing a cup of coffee with the Keurig Mini is as easy as pie. Here’s how you can turn those coffee dreams into a steamy reality:
- Power Up: Make sure your Keurig Mini is plugged in and powered up. You’ll know it’s ready when the power indicator lights up.
- Water First: Begin by filling your favorite mug with water, then pour it into the water reservoir. This way, you’re brewing just the right amount for your cup.
- Pick Your Pod: Choose your K-Cup or pop in your reusable filter filled with ground coffee. Lift the handle, place the K-Cup in the holder, and then close the handle securely.
- Brew Time: Hit the brew button and watch the magic happen. The brewing process takes just a few minutes, so you won’t have to wait long for that aromatic cup of coffee.
- Enjoy: Once the brewing is complete, the machine will go quiet, and your coffee will be ready to enjoy. Don’t forget to remove the used K-Cup or reusable filter.
Special Features of the K-Mini Plus
Got a K-Mini Plus? You’re in for a treat with its special ‘Strong’ button. If you’re someone who enjoys a bolder taste, simply press this button before brewing. It adjusts the brewing process to extract more flavor and strength from your coffee, giving you that extra kick to start your day. Remember, the K-Mini Plus also has a removable water reservoir, making refills and cleaning a breeze.
Maintenance and Cleaning
Keeping your Keurig Mini clean is the secret to enjoying delicious coffee every day. Here’s how to keep it in tip-top shape:
Daily Love: After each use, eject the used K-Cup and give the drip tray and pod holder a quick rinse. This prevents buildup and keeps your brews tasting fresh.
Weekly Wipe-down: Once a week, wipe the exterior with a damp cloth. Don’t forget to clean the area around the coffee pod holder – coffee splatters can get messy!
Monthly Check-up: Every month, remove the drip tray and wash it with soapy water. If your model has a removable water reservoir, clean that too.
Descaling Your Keurig Mini
Descaling is like a spa treatment for your Keurig Mini. It removes calcium deposits that can affect the taste of your coffee and the performance of your machine. Here’s a simplified descaling routine:
- Descaling Solution: Mix Keurig’s descaling solution with water and pour it into the reservoir.
- Start the Process: Run a brewing cycle without a K-Cup to circulate the solution through the machine.
- Let It Sit: Let the solution sit in the machine for about 30 minutes.
- Rinse Thoroughly: Finish by running several cycles with just water to rinse out any remaining solution.
Doing this every 3 to 6 months keeps your Keurig Mini healthy.
Troubleshooting Common Issues
Even the best machines hiccup sometimes. Here are quick fixes for common Keurig Mini woes:
It Won’t Brew: Ensure it’s plugged in and the reservoir is filled with water. Sometimes, giving the machine a gentle tap can dislodge any trapped air bubbles.
Coffee Tastes Off: This could be a sign it’s time to descale. Also, check if the K-Cup is properly inserted and not expired.
Leaks: Make sure the water reservoir is seated correctly. Overfilling the reservoir can also cause leaks, so keep an eye on the water level.
Regular maintenance and a bit of troubleshooting can go a long way in ensuring your Keurig Mini provides the perfect cup every time.
FAQs
Q: Can I use my own coffee with the Keurig Mini?
A: Absolutely! Just grab a reusable K-Cup filter, fill it with your favorite ground coffee, and brew away.
Q: How often should I clean my Keurig Mini?
A: Rinse the pod holder and drip tray daily, and give the whole machine a thorough clean once a month. Don’t forget to descale every 3-6 months!
Q: Why is my Keurig Mini not brewing?
A: Check if it’s plugged in and the reservoir has water. If it’s still not working, a little tap on the machine might help release any air bubbles blocking the water flow.
Q: Can I make tea or hot chocolate with my Keurig Mini?
A: Yes, you can! There are K-Cup pods available for tea and hot chocolate as well. Just pop in the pod and brew as usual.
Final Thoughts
The Keurig Mini is a nifty little machine that packs a punch, perfect for any coffee lover in a compact space. Remember to choose your K-Cup or reusable filter wisely, keep an eye on the water level, and maintain a regular cleaning and descaling routine. With these tips, you’ll ensure your Keurig Mini continues to brew perfect cups of coffee, tea, or hot chocolate whenever you desire.


